32
SPECIFICATIONS PRODUIT (Suite)
Liste des signaux recommandés
Avec entrée HDMI
VGA
480i
480p
576i
576p
720p
1080i
Résolution
640 × 480
640 × 480
720 × 480
720 × 480
720 × 480
720 × 480
720 × 576
720 × 576
1280 × 720
1280 × 720
1280 × 720
1920 × 1080
1920 × 1080
1920 × 1080
Avec entrée RGB
VGA
SVGA
WVGA
XGA
WXGA
Résolution
640 × 400
640 × 480
640 × 480
800 × 600
800 × 600
848 × 480
1024 × 768
1024 × 768
1280 × 720
1280 × 768
1360 × 768
Fréquence verticale
(Hz)
60
60
60
60
60
60
50
50
50
60
60
50
60
60
Fréquence verticale
(Hz)
70
75
60
60
75
60
60
75
60
60
60
Fréquence horizontale
(kHz)
31.5
31.5
15.7
15.6
31.5
31.5
15.6
31.3
37.5
45
45
28.1
33.7
33.8
Fréquence horizontale
(kHz)
31.5
37.5
31.5
37.9
46.9
37.9
48.4
60
44.8
47.4/47.8
47.7
Les valeurs numériques des résolutions et des fréquences mentionnées ci-dessus sont standard.
Elles peuvent être différentes des valeurs réelles pendant l’affichage.
1
TV SETUP Installation
TV-Einstellung
Installation du téléviseur
Installazione Setup TV
RF LEADS
RF-KABEL
CÂBLES HF
PRESE RF
B
C
AERIAL*
ANTENNE*
ANTENNE*
ANTENNA*
IN
OUT
IN
OUT
CAMCORDER
CAMCORDER
CAMÉSCOPE
VIDEOCAMERA
2 PHONO LEADS
(AUDIO L, AUDIO R) (optional)
2 PHONO-KABEL
(AUDIO L, AUDIO R) (optional)
2 CÂBLE PHONO
(AUDIO G, AUDIO D) (optionnels)
2 CAVO AUDIO
(AUDIO S, AUDIO D) (optional)
DIGIBOX (STB)
DIGIBOX (STB)
DIGIBOX (Boîtier adaptateur)
DIGIBOX (STB)
S-CABLE
S-KABLE
CÂBLE S
CAVO-S
IN
OUT
IN
OUT
R L
R L
AUX
VCR TV
COMPONENT VIDEO OUT
Y C
R
COMPONENT VIDEO OUT
Y C
R
VCR
VIDEOREKORDER
Magnétoscope
VIDEOREGISTATORE
AV2/
DECODER
AV1/TV
SCART LEADS (optional)
SCART-KABEL (optional)
CÂBLES PÉRITEL (optionnels)
PRESE SCART (opzionali)
HDMI
HDMI
DVD PLAYER
DVD-PLAYER
LECTEUR DE DVD
LETTORE DVD
5 PHONO LEADS
(Y, P
B
, P
R
, AUDIO L, AUDIO R) (optional)
5 PHONO-KABEL
(Y, P
B
, P
R
, AUDIO L, AUDIO R) (optional)
5 CÂBLE PHONO
(Y, P
B
, P
R
, AUDIO G, AUDIO D) (optionnels)
5 CAVO AUDIO
(Y, P
B
, P
R
, AUDIO S, AUDIO D) (optional)
DVD PLAYER
DVD-PLAYER
LECTEUR DE DVD
LETTORE DVD
SCART LEADS (optional)
SCART-KABEL (optional)
CÂBLES PÉRITEL (optionnels)
PRESE SCART (opzionali)
D
TV rear Panel
Monitorrückseite
Panneau arrière du moniteur
Monitor Pannello posteriore
A
U.K. ONLY
Nur Großbritannien
R.U. UNIQUEMENT
Solo Regno Unito
Except UK
Außer Großbritannien
Sauf R.U.
Ad eccezione del Regno Unito
DVD PLAYER
DVD-PLAYER
LECTEUR DE DVD
LETTORE DVD
R L
HDMI LEAD (optional)
HDMI-KABEL (optional)
CÂBLE HDMI (optionnels)
CAVO HDMI (opzionali)
COMPONENT VIDEO OUT
Y C
R
HDMI
English Deutsch
IMPORTANT
: Failure to observe the following guidelines could result in serious overheating of your TV, or even, in extreme cases, fire.
Ensure there is at least a 100mm (10cm) gap to the sides, rear and top of the television if placing into a cabinet or mounting in a wall. This is to allow for adequate ventilation.
Do not allow soft furnishings, such as curtains to be draped over the TV whilst in operation.
Never place the TV onto a carpet during normal operation - this could obstruct ventilation slots on the base of the TV.
Always place the TV on a flat surface, or if supplied, the stand accessory.
A
Connect the main lead to the Plasma TV.
B
Connect aerial connection lead to the DIGIBOX(STB) ‘in’ socket marked .
C
Connect DIGIBOX(STB) ‘out’ to VCR ‘in’ socket marked .
D Connect VCR ‘out’ to ANT on Plasma TV socket marked ‘ANT’.
NOTE
If you are not using any of the devices shown in the diagram above, plug the aerial directly into the TV.
WICHTIG : Bei Nichtbeachtung der folgenden Anleitungen kann sich das
Fernsehgerät überhitzen und, im Extremfall, sogar einen Brand auslösen.
Achten Sie darauf, dass ein Freiraum von mindestens 100 mm
(10 cm) an den Seiten, hinter und über dem Fernsehgerät vorhanden ist, wenn Sie das Gerät in einem Schrank aufstellen oder an der Wand montieren. Auf diese Weise wird für die geeignete Belüftung gesorgt.
Hüllen Sie das Fernsehgerät während des Betriebs nicht in weiche
Einrichtungsgegenstände, wie etwa Vorhänge. Stellen Sie das
Fernsehgerät während des normalen Betriebs nie auf einen.
Teppich. Dieser könnte die auf der Unterseite des Fernsehgeräts befindlichen Belüftungsöffnungen blockieren.
Stellen Sie das Fernsehgerät immer auf einer ebenen Fläche auf oder, falls vorhanden, auf dem Ständer.
A Schließen Sie das Hauptstromkabel am Plasmabildschirm an.
B
C
D
Schließen Sie das Antennenkabel an die mit markierte DIGIBOX
(STB)-Eingangsbuchse an.
Schließen Sie die DIGIBOX (STB)-Ausgangsbuchse an die mit markierte Eingangsbuchse des Videorekorders an.
Verbinden Sie die Videorekorder-Ausgangsbuchse ‘out
,
in die mit markierte Antennenbuchse (ANT) am Plasmabildschirm an.
HINWEIS
Falls Sie keines der oben dargestellten Geräte verwenden, stecken Sie die
Antenne direkt am Fernseher ein.
2
Insert the batteries into your handset
2
Setzen Sie die Batterien in die Fernbedienung ein
Français Italiano
IMPORTANT : Ne pas observer les directives suivantes peut entraîner une surchauffe importante de votre téléviseur et même dans les cas extrêmes, un incendie.
Assurez-vous qu’il y a un espace d’au moins 100 mm (10 cm) sur les côtés, à l’arrière et au-dessus du téléviseur, s’il est placé dans un meuble ou monté dans un mur. Cela permet une ventilation correcte.
Ne recouvrez pas le téléviseur d’un tissus tel qu’un rideau pendant qu'il est en cours de fonctionnement.
Ne placez jamais le téléviseur sur un tapis pendant sont fonctionnement normal - cela pourrait boucher les fentes de ventilation situées dessous le téléviseur.
Placez toujours le téléviseur sur une surface plate, ou, s’il est fourni, sur un socle.
A Connectez le câble d'antenne à l’écran à plasma.
B
C
D
Connectez le câble de connexion d’antenne à la prise marquée ‘in’ du
DIGIBOX (boîtier adaptateur).
Connectez la prise marquée ‘out’ du DIGIBOX (boîtier adaptateur) à la prise marquée ‘in’ du magnétoscope.
Connectez la prise marquée ‘out’ du magnétoscope à la prise marquée
ANT de l’écran à plasma.
REMARQUE
Si vous n’utilisez aucun des appareils indiqués sur le schéma ci-dessus, branchez directement l’antenne sur le TV.
2
Insérez les piles dans votre télécommande
IMPORTANTE : L’inosservanza delle seguenti linee guida potrebbe provocare un grave surriscaldamento della vostra TV, o persino, in casi estremi, un incendio.
Assicurarsi che vi sia uno spazio di almeno 100 mm (10 cm) sui lati, sul retro e sulla parte superiore del televisore se esso è riposto su un mobile o montato a muro. Ciò permetterà una ventilazione adeguata.
Non permettere che gli arredi morbidi, come per esempio, le tende, pendano sulla TV mentre essa è in funzione.
Mai posizionare la TV su un tappeto durante il normale funzionamento – questo potrebbe ostruire i fori di ventilazione sulla base della TV.
Posizionare sempre la TV su una superficie piana, o sull’accessorio di supporto, se in dotazione.
A Collegare il cavo principale allo Schermo al Plasma.
B
C
Collegare il cavo del collegamento dell’antenna al DIGIBOX (STB) ‘in’ presa contrassegnata con .
Collegare il DIGIBOX (STB) ‘out’ al VCR ‘in’ presa contrassegnata con .
D
Collegare il VCR ‘out’ a ANT sullo Schermo al Plasma presa contrassegnata con .
NOTA
Se non utilizzate nessuno dei dispositivi mostrati nello schema qui sopra, inserite il cavo dell’antenna direttamente nel televisore.
2
Inserire le batterie nel vostro telecomando
3
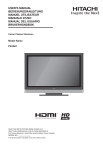
Connect the TV plug to the mains socket
UK plug
European plug
3
Stecken Sie den Netzstecker des Fernsehgeräts in eine
Wandsteckdose ein
Stecker für Großbritannien
Stecker für Europa
3
Connectez la fiche d’alimentation du téléviseur sur une prise secteur murale
Prise britannique
Prise européenne
3
Collegare la spina della TV nella presa elettrica
Spina Regno Unito
Spina europea
insert plug...
...and switch on insert plug...
4
Switch your TV on, ready to start Auto setup procedure...
Führen Sie den
Stecker ein …
...und schalten Sie den Schalter ein
Führen Sie den
Stecker ein …
4
Schalten Sie Ihr Fernsehgerät ein, um das automatische
Setup beginnen zu können ...
insérez la fiche...
...et mettez sous tension insérez la fiche...
4
Mettez votre TV sous-tension, prêt à démarrer la procédure d’auto-installation…
inserire la spina...
...e accendere inserire la spina...
4
Accendete il vostro televisore, pronti ad avviare la procedura di configurazione automatica...
Main Power switch
(on the left of the TV)
IMPORTANT NOTE : Do not switch your TV on until all external equipment is connected. If you have a Video Cassette Recorder or a Satellite receiver connected to this TV, please ensure that they are switched on before automatic tuning begins. In the case of a VCR, insert a prerecorded tape and begin playback of your equipment. With a Satellite receiver, select Sky News.
These measures ensure that all your external equipment is tuned in during the autotune procedure.
To minimize the potential for the occurrence of image retention, reduce the
Brightness and Contrast levels as much as possible without impairing image quality.
Hauptschalter
(an der linken Seite des Fernsehgerätes)
WICHTIGER HINWEIS : Schalten Sie das Fernsehgerät erst ein, wenn alle externen Geräte angeschlossen sind. Falls ein Videokassettenrekorder oder
Satellitenreceiver an dieses Fernsehgerät angeschlossen ist, sorgen Sie dafür, dass diese Geräte eingeschaltet werden, bevor die automatische
Kanalsuche beginnt. Im Falle eines Videorekorders setzen Sie ein bespieltes Band in das Gerät ein, und beginnen Sie dann mit der
Wiedergabe dieses Bandes. Bei einem Satellitenreceiver wählen Sie Sky
News. Auf diese Weise wird sichergestellt, dass alle externen Geräte bei der automatischen Kanalsuche eingestellt werden.
Die Gefahr einer Bildretention kann reduziert werden, indem die Helligkeits- und Kontraststufen so weit als möglich verringert werden, ohne die
Bildqualität zu beeinträchtigen.
Bouton d’alimentation générale (à gauche du TV)
REMARQUE IMPORTANTE : Ne mettez pas votre téléviseur sous tension tant que tous les appareils extérieurs ne sont pas connectés. Si un magnétoscope ou un récepteur satellite est connecté à ce téléviseur, assurez-vous de le mettre sous tension avant de commencer le réglage automatique. Dans le cas d’un magnétoscope, insérez une cassette préenregistrée et démarrez sa lecture. Dans le cas d'un récepteur satellite, choisissez Sky News. Ces mesures permettent d’assurer que votre appareil extérieur est accordée pendant la procédure de réglage automatique.
Pour réduire le potentiel de rétention d’image, diminuez autant que possible les niveaux de Luminosité et de Contraste sans que cela n’affecte la qualité de l’image.
J32V0107A SH
P
Interruttore di alimentazione principale (a sinistra del televisore)
NOTA IMPORTANTE : Non accendete la vostra TV finché tutti i dispositivi esterni non siano collegati. Se avete un Registratore di Cassette Video o un ricevitore Satellitare collegato alla TV, assicuratevi che siano accesi prima che inizi la sintonizzazione automatica. Nel caso di un VCR, inserire un nastro pre-registrato e avviare la riproduzione dell’apparecchio. Con un ricevitore Satellitare, selezionare Sky News. Questi provvedimenti garantiscono che tutti i vostri dispositivi esterni siano sintonizzati durante la procedura di sintonizzazione automatica.
Per minimizzare la possibilità della ritenzione di immagini, ridurre i livelli di
Luminosità e Contrasto il più possibile senza compromettere la qualità dell'immagine.
English
Handset Controls used for Television Auto setup
MENU
Use this button to display the main menu.
ENTER
Use this button to set a highlighted selection cursor left/right
This button is used to move the menu selection boxleft/right or change ahighlighted selection.
cursor up/down
This button is used to move the menu selection boxup/down or change ahighlighted selection.
5
Start Auto setup procedure
When the TV powers on for the first time after purchase, the initial auto installation menu will appear. You can automatically set language, country and channels in successive operations.
1
Press STANDBY on the right side of the unit or press (STANDBY) on the remote. The Language select menu will appear first.
2
Press ▲/▼ or ◀/▶ to select desired language.
Then press ENTER.
L A N G U A G E
E n g l i s h
F r a n ç a i s
D e u t s c h
E s p a ñ o l
I t a l i a n o
Р у с с к и й
S v e n s k a
S u o m i
: S E L ECT
E N T E R : S E T
D a n s k
N o r s k
N e d e r l a n d s
Ε λ λ η ν ι κ ά
T ü r k ç e
P o r t u g u ê s
P o l s k i
3
Press ▲ or ▼ to select desired Country.
Then press ENTER.
E X I T
: S E L ECT
4
Check the aerial then press ENTER.
C O U N T R Y
U K
I R E L A N D
F R A N C E
B E L G I U M
L U X E M B O U R G
G E R M A N Y
A U S T R I A
S W I T Z E R L A N D
G R E E C E
5
Press ▲ or ▼ to select the colour system.
: S E L ECT
E N T E R : S E T E X I T : E N D
NOTE
Most of Western Europe uses the PAL system but France uses SECAM.
6
Press ENTER to start automatic tuning.
Your TV will now automatically tune in all available channels.
NOTE
Please be patient - the Auto Tuning process can take several minutes to complete.
When the tuning screen disappears and then normal TV screen appears, the Auto tuning process is complete.
Français
Boutons de la télécommande utilisés pour l’auto-installation du téléviseur
MENU
Utilisez cette touche pour afficher le menu principal.
ENTER
Utilisez cette touche pour régler un article mis en valeur.
curseur gauche/droit
Cette touche est utilisée pour déplace le cadre de sélection du menu vers la gauche/droite ou pour changer un article mis en valeur.
curseur haut/bas
Cette touche est utilisée pour déplace le cadre de sélection du menu vers le haut/bas ou pour changer un article mis en valeur.
5
Démarrage de la procédure d’auto-installation
L’auto installation initiale a lieu lousque le téléviseur est mis sous tension pour la première fois après l’achat. Vous pouvez régler automatiquement la langue, le pays et les canaux par opérations successives.
1
Appuyez sur STANDBY sur le coté droit de l’appareil ou pressez (STANDBY) sur la télécommande.
Le menu selection de langue apparaît en premier.
2
Presser ▲/▼ ou ◀/▶ pour choisir la langue désirée. Puis presser ENTER.
3
Appuyez sur ▲ ou ▼ pour sélectioner le pays souhaité. Appuyez ensuite sur ENTER.
L A N G U E
E n g l i s h D a n s k
F r a n ç a i s N o r s k
D e u t s c h N e d e r l a n d s
E s p a ñ o l
I t a l i a n o
Р у с с к и й
S v e n s k a
S u o m i
Ε λ λ η ν ι κ ά
T ü r k ç e
P o r t u g u ê s
P o l s k i
: S E L ECT
E N T E R : M A RC H E E X I T
: S E L ECT
: F I N
4
Vérifiez l’antenne puis pressez ENTER.
P A Y S
U K
I R L A N D E
F R A N C E
B E L G I Q U E
L U X E M B O U R G
A L L E M A G N E
A U T R I C H E
S U I S S E
G R È C E
: S E L ECT
E N T E R : M A RC H E
5
Appuyez sur ▲ ou ▼ pour sélectionner le système de couleur.
E X I T : F I N
REMARQUE
La plupart des pays d’Europe de l’ouest utilisent le système PAL, mais la France utilise le système SECAM.
6
Appuyez sur ENTER pour démarrer la recherche automatique.
Votre téléviseur va maintenant rechercher automatiquement toutes les chaînes disponibles.
REMARQUE
Il faut être patient – le processus de recherche automatique peut prendre quelques minutes.
Lorsque l’écran de recherche disparaît, et qu’alors l’écran neutre des chaînes apparaît, le processus de recherche automatique est achevé.
Deutsch
Fernbedienungstasten für das automatische
Setup des Fernsehgerätes
MENU
Durch Drücken dieser
Taste wird das
Hauptmenü angezeigt.
ENTER
Mit dieser Taste können
Sie den hervorgehobenen
Auswahlposten einstellen.
Cursor links/rechts
Mit dieser Taste können
Sie die Menü-Wahlbox nach links/rechts verschieben oder den hervorgehobenen
Auswahlposten ändern.
Cursor aufwärts/abwärts
Mit dieser Taste können
Sie die Menü-Wahlbox nach aufwärts/abwärts verschieben oder den hervorgehobenen
Auswahlposten ändern.
5
Automatisches Setup beginnen
Wenn der TV nach dem Kauf zum ersten Mal eingeschaltet wird, beginnt die anfängliche
Autoinstallation. Sie können automatisch der Reihe nach Sprache, Land und die Kanäle einstellen.
1
Drücken Sie STANDBY auf der rechten Seite des Geräts oder drücken Sie
(STANDBY) auf der Fernbedienung. Das Sprachenauswahlmenü erscheint zuerst.
2
Mit oder ▲/▼ oder ◀/▶ Sprache wКhlen.
Dann ENTER drücken.
3
Drücken Sie ▲ oder ▼ um Ihr Land auszuwählen.
Drücken Sie anschließend ENTER.
S P R A C H E
E n g l i s h
F r a n ç a i s
Р у с с к и й
S v e n s k a
S u o m i
D a n s k
N o r s k
D e u t s c h N e d e r l a n d s
E s p a ñ o l Ε λ λ η ν ι κ ά
I t a l i a n o T ü r k ç e
P o r t u g u ê s
P o l s k i
: WA E H L E N
E N T E R : S E T E X I T
: WA E H L E N
: E N D E
4
Überprüfen Sie den Kabelanschluss oder die
Antenne und drücken Sie anschließend ENTER.
L A N D
E N G L A N D
I R L A N D
F R A N K R E I C H
B E L G I E N
L U X E M B U R G
D E U T S C H L A N D
Ö S T E R R E I C H
S C H W E I Z
G R I E C H E N L A N D
5
Drücken Sie ▲ oder ▼ um das Farbsystem auszuwählen.
: WA E H L E N
E N T E R : S E T E X I T : E N D E
HINWEIS
Die meisten westeuropäischen Länder verwenden ein PAL-System, in Frankreich hingegen ist SECAM im Einsatz.
6
Drücken Sie ENTER, um den automatischen Tuning-Vorgang zu starten.
Ihr Fernsehgerät sucht nun automatisch alle verfügbaren Programme.
HINWEIS
Die automatische Speicherung kann einige Minuten dauern.
Sobald der Tuning-Bildschirm ausgeblendet wird und das normale Fernsehbild erscheint, ist das automatische Tuning abgeschlossen.
Italiano
Comandi Telecomando utilizzati per la configurazione automatica
MENU
Usare questo tasto per accedere al menu principale.
ENTER
Usare questo tasto per confermare una selezione evidenziata.
Cursore
Sinistra/Destra
Questo tasto si usa per spostare sinistra/destra la scatola del menu di selezione o cambiare una selezione evidenziata.
Cursore Su/Giù
Questo tasto viene usato per spostare su/giù la casella di selezione del menu o modificare una selezione evidenziata.
5
Avviamento della procedura di configurazione automatica
Quando si accende il televisore per la prima volta dopo l’acquisto avviene l’autoinstallazione iniziale. È possibile impostare automaticamente la lingua, il paese ed i canali in operazioni successive.
1
Premere STANDBY sul lato destro dell’unità o premere (STANDBY) sul telecomando. Comparirà per primo il menu di selezione della Lingua.
2
Premere ▲/▼ o ◀/▶ per selezionare la lingua desiderate. Quindi premere ENTER.
L I N G U A
E n g l i s h
F r a n ç a i s
D e u t s c h
E s p a ñ o l
I t a l i a n o T ü r k ç e
Р у с с к и й P o r t u g u ê s
S v e n s k a P o l s k i
S u o m i
D a n s k
N o r s k
N e d e r l a n d s
Ε λ λ η ν ι κ ά
: S E L E Z .
E N T E R : O N E X I T
: S E L E Z .
: F I N E
3
Premere ▲ o ▼ per selezionare il paese desiderato. Quindi premere ENTER.
4
Controllare l’antenna, quindi premere ENTER.
P A E S E
I N G H I LT E R R A
I R L A N D A
F R A N C I A
B E L G I O
L U S S E M B U R G O
G E R M A N I A
A U S T R I A
S V I Z Z E R A
G R E C I A
: S E L E Z .
E N T E R : O N
5
Premere ▲ o ▼ per selezionare il sistema cromatico.
E X I T : F I N E
NOTA
La maggior parte dei paesi dell’Europa occidentale usano il sistema PAL, ma la
Francia usa il SECAM.
6
Premere ENTER per avviare la sintonia automatica.
Ora il vostro televisore si sintonizzerà su tutti i canali disponibili.
NOTA
Si prega di attendere – il processo di SINTONIA AUTOMAT. può richiedere diversi minuti per essere completato.
Quando scompare la schermata di sintonizzazione e compare la schermata normale del televisore, il processo di Sintonia Automat. è completo.
Hitachi Ltd.
Consumer Business Group
Shin-Otemachi Bldg 5f, 2-1, Otemachi 2-Chome,
Chiyoda-Ku, Tokyo 100-0004 Japan
HITACHI EUROPE LTD.
Consumer Affairs Department
PO Box 3007
Maidenhead
Berkshire SL6 8ZE
UNITED KINGDOM
Tel: 0870 405 4405
Email: [email protected]
HITACHI EUROPE S.A.
364, Kifissias Ave. & 1, Delfon Str.
152 33 Chalandri
Athens
GREECE
Tel: 210 6837200
Fax: 210 6835694
Email: [email protected]
HITACHI EUROPE GmbH
Munich Office
Dornacher Strasse 3
D-85622 Feldkirchen bei München
GERMANY
Tel: 089-991 80 - 0
Fax: 089 - 991 80 - 224
Hotline: 0180 - 551 25 51 (12ct/min.)
Email: [email protected]
HITACHI EUROPE S.A.
Gran Via Carles III, 86 Planta 5ª
Edificios Trade - Torre Este
08028 Barcelona
SPAIN
Tel: 93 409 2550
Fax: 93 491 3513
Email: [email protected]
HITACHI EUROPE S.r.l.
Via T. Gulli, 39
20147 MILANO
ITALY
Servizio Clienti
Tel. 02 38073415
HITACHI EUROPE AB
Box 77
S-164 94 KISTA
SWEDEN
Tel: 08 562 711 00
Fax: 08 562 711 11
Email: [email protected]
HITACHI EUROPE S.A.S
Digital Media Group
Cité Internationale
94 Quai Charles de Gaulle,
69463 LYON cedex 06
FRANCE
Tel: 04 72 14 29 70
Fax: 04 72 14 29 99
Email: [email protected]
HITACHI EUROPE AB
(Norway Branch Nuf)
Strandveien 18
1366 Lysaker
NORWAY
Tel: 67519030
Fax: 67519032
Email [email protected]
HITACHI EUROPE LTD.
Benelux Branche Office
Bergensesteenweg 421
1600 Sint-Pieters-Leeuw
BELGIUM
Tel: 0032/2 363 99 01
Fax: 0032/2 363 99 00
Email
:
[email protected]
HITACHI EUROPE LTD.
Kodanska 46
101 00 Praha 10
CZECH REPUBLIC
Tel: 234 064 514
Fax: 234 064 513
Email: [email protected]
HITACHI EUROPE AB
Egebækvej 98
2850 Nærum
DENMARK
Tel: 43 43 60 50
Fax: 43 43 60 51
Email : [email protected]
HITACHI EUROPE AB
Lars Sonckin kaari 16
FIN-02600 ESPOO
FINLAND
Tel: 010-8503085
Fax: 010-8503086
E-mail: [email protected]
www.hitachidigitalmedia.com