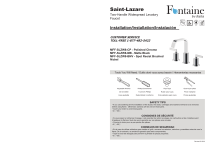
Fontaine by Italia MFF-SLZW8-CP Saint-Lazare 2-Handle 8 Guide d'installation
Vous trouverez ci-dessous des informations utiles pour Saint-Lazare MFF-SLZW8-CP, Saint-Lazare MFF-SLZW8-MB, Saint-Lazare MFF-SLZW8-BNV. Ce manuel vous guide à travers l'installation de votre nouveau robinet de lavabo à deux poignées, comprenant les outils nécessaires, les consignes de sécurité et les étapes d'installation détaillées. Il fournit également une liste des pièces de rechange disponibles pour faciliter l'entretien futur.
Fonctionnalités clés
Installation facile avec des instructions claires
Construction durable pour une longue durée de vie
Design élégant pour améliorer l'esthétique de la salle de bain
Pièces de rechange disponibles pour l'entretien
Foire aux questions
Vous aurez besoin d'une clé à molette, d'un tournevis Phillips, de ruban pour tuyau et d'une pince multiprise.
Retirez les sièges, les cartouches et les rondelles avant d'appliquer la flamme pour éviter d'annuler la garantie.
Consultez la liste des pièces de rechange avec leur numéro de pièce dans le manuel.
Associés

日東工業株式会社 BP51-24B: Chat IA et téléchargement PDF
Danze D306457 Robinet de lavabo : Chat IA et PDF
Danze D216540 Robinet Mural: Chat IA & PDF
Danze D225558 Robinet de lavabo: Chat IA & PDF
Danze D331558 Robinet Lavabo: Chat IA & PDF
Two-Handle Lavatory Faucet : Chat IA et téléchargement PDF
Home Decorators Collection 9784500270 Aberdeen 30 in. W Open Shelf Vanity spécification

PS2131 PEF Kit de réparation robinet | Chat IA et PDF
D216144T Robinet Mural Danze: Chat IA & PDF
Pfister Pfirst Series 171-2100 Laundry Utility Manuel utilisateur
